Module 1: Lab - Transaction Classification Application
In this lab, you will create a transaction classification application that uses the Azure OpenAI API and other Azure services to classify a public dataset of transactions into a number of categories that we have predefined. These approaches should be replicable to any multiclass classificaiton use case where we are trying to fit transactional data into predefined categories, and by the end of running through this you should have an approach for dealing with unlabelled datasets.
For this workshop, we will be using GitHub Actions using OpenID Connect and Infrastructure-as-Code (IaC) using Bicep, to derive following benefits:
- Infrastructure-as-Code (IaC) - Infrastructure is defined as code, and can be version controlled and reviewed.
- OpenID Connect - OpenID Connect is an authentication protocol that allows you to connect securely to Azure resources using your GitHub account.
- GitHub Actions - GitHub Actions is a feature of GitHub that allows you to automate your software development workflows.
Steps for Deploying the infrastructure
- Creating an Azure Resource Group
- Creating Azure OpenAI API resource and deployment of
text-davinci-003model - Configuring OpenID Connect in Azure.
- Setting Github Actions secrets
- Enabling the GitHub Actions workflow
- Creation of Azure Storage Account and Azure Function App
- Deploying the Azure Function App code
- Creating and configuring Event Grid Subscription
Creating an Azure Resource Group
az login
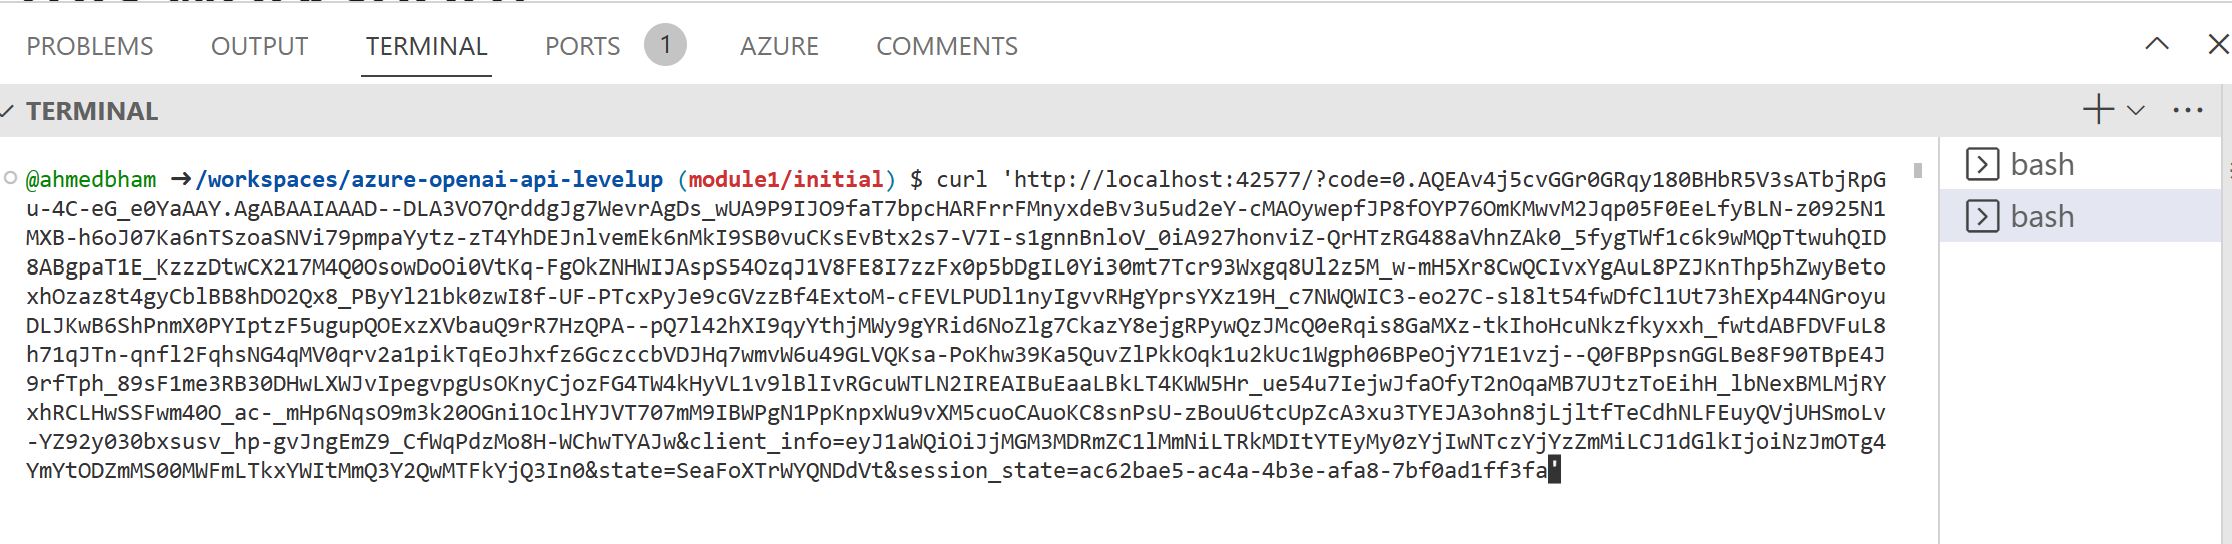
[!NOTE] if you are using a non-Microsoft account (e.g. FDPO account), and if are running CodeSpaces in the browser, you may receive an error with message
localhost refused to connectafter logging in.If so:
- Copy the URL.
- Run
curl '<pasted url>'(URL in quotes) in a new Visual Studio Code terminal.
- In the original terminal, the login should now succeed.
Set appropriate Subscription Id
az account set -s <your-subscription-id>
Ensure correct Subscription Id is set
az account show
Register the following providers
az provider register --namespace Microsoft.Storage --wait
az provider register --namespace Microsoft.Web --wait
az provider register --namespace Microsoft.EventGrid --wait
Create Azure Resource Group
export resourceGroupName="openai-levelup-rg"
export location="eastus"
az group create --name $resourceGroupName --location $location
Creating Azure OpenAI API resource and deployment of text-davinci-003 model
If you have not already created an Azure OpenAI API resource and deployed the text-davinci-003 model, you can follow the instructions here to do so.
Configuring OpenID Connect in Azure
Execute chmod command on aad-federated-cred.sh script to make it executable:
chmod +x ./tools/deploy/module0/aad-federated-cred.sh
- execute aad-federated-cred.sh, passing your github username as the argument, as shown below:
./tools/deploy/module0/aad-federated-cred.sh <your-github-username>
- note down the appId echoed for use in next step
Setting Github Actions secrets
- In your forked Github repository, click on the
Settingstab. - In the left-hand menu, expand
Secrets and variables, and click onActions. - Click on the
New repository secretbutton for each of the following secrets:AZURE_SUBSCRIPTION_ID(runaz account show --query id -o tsvto get the value)AZURE_TENANT_ID(runaz account show --query tenantId --output tsvto get the value)AZURE_CLIENT_ID(this is theappIdfrom running the previous step)AZURE_RESOURCE_GROUP(this is theresourceGroupNamefrom earlier step, which isopenai-levelup-rg)
Enable GitHub Actions workflow
- Enable GitHub Actions for your repository by clicking on the Actions tab, and clicking on the
I understand my workflows, go ahead and enable thembutton.
Creation of Azure Storage Account and Azure Function App
- This is achieved by running the Github Actions workflow file module1-infra-worflow.yaml which executes module2-infra.bicep Bicep template. To trigger this workflow manually:
- click on the
Actionstab. - Select
Deploy Module 1 Infrastructureworkflow. - Click on the
Run workflowbutton
- click on the
Deploying the Azure Function App code
- Deploy the Azure Function App code using Github Actions workflow file module2-code-workflow.yaml as follows:
- Click on the
Actionstab. - Select
Deploy Azure Function Appworkflow. - Click on the
Run workflowbutton
- Click on the
- Configure following Application Settings for the Azure Function by going to your
function app > Configuration > Application Settings:- OPENAI_API_BASE - Azure OpenAI API Endpoint URL (e.g. https://openai-demo-ahmedbham.openai.azure.com/)
- OPENAI_API_KEY - Azure OpenAI API Key
- OPENAI_API_MODEL - “text-davinci-003” (set it equal to the
model nameyou provided when deploying thetext-davinci-003model in Azure OpenAI Studio) Remember to click Save after adding the above settings
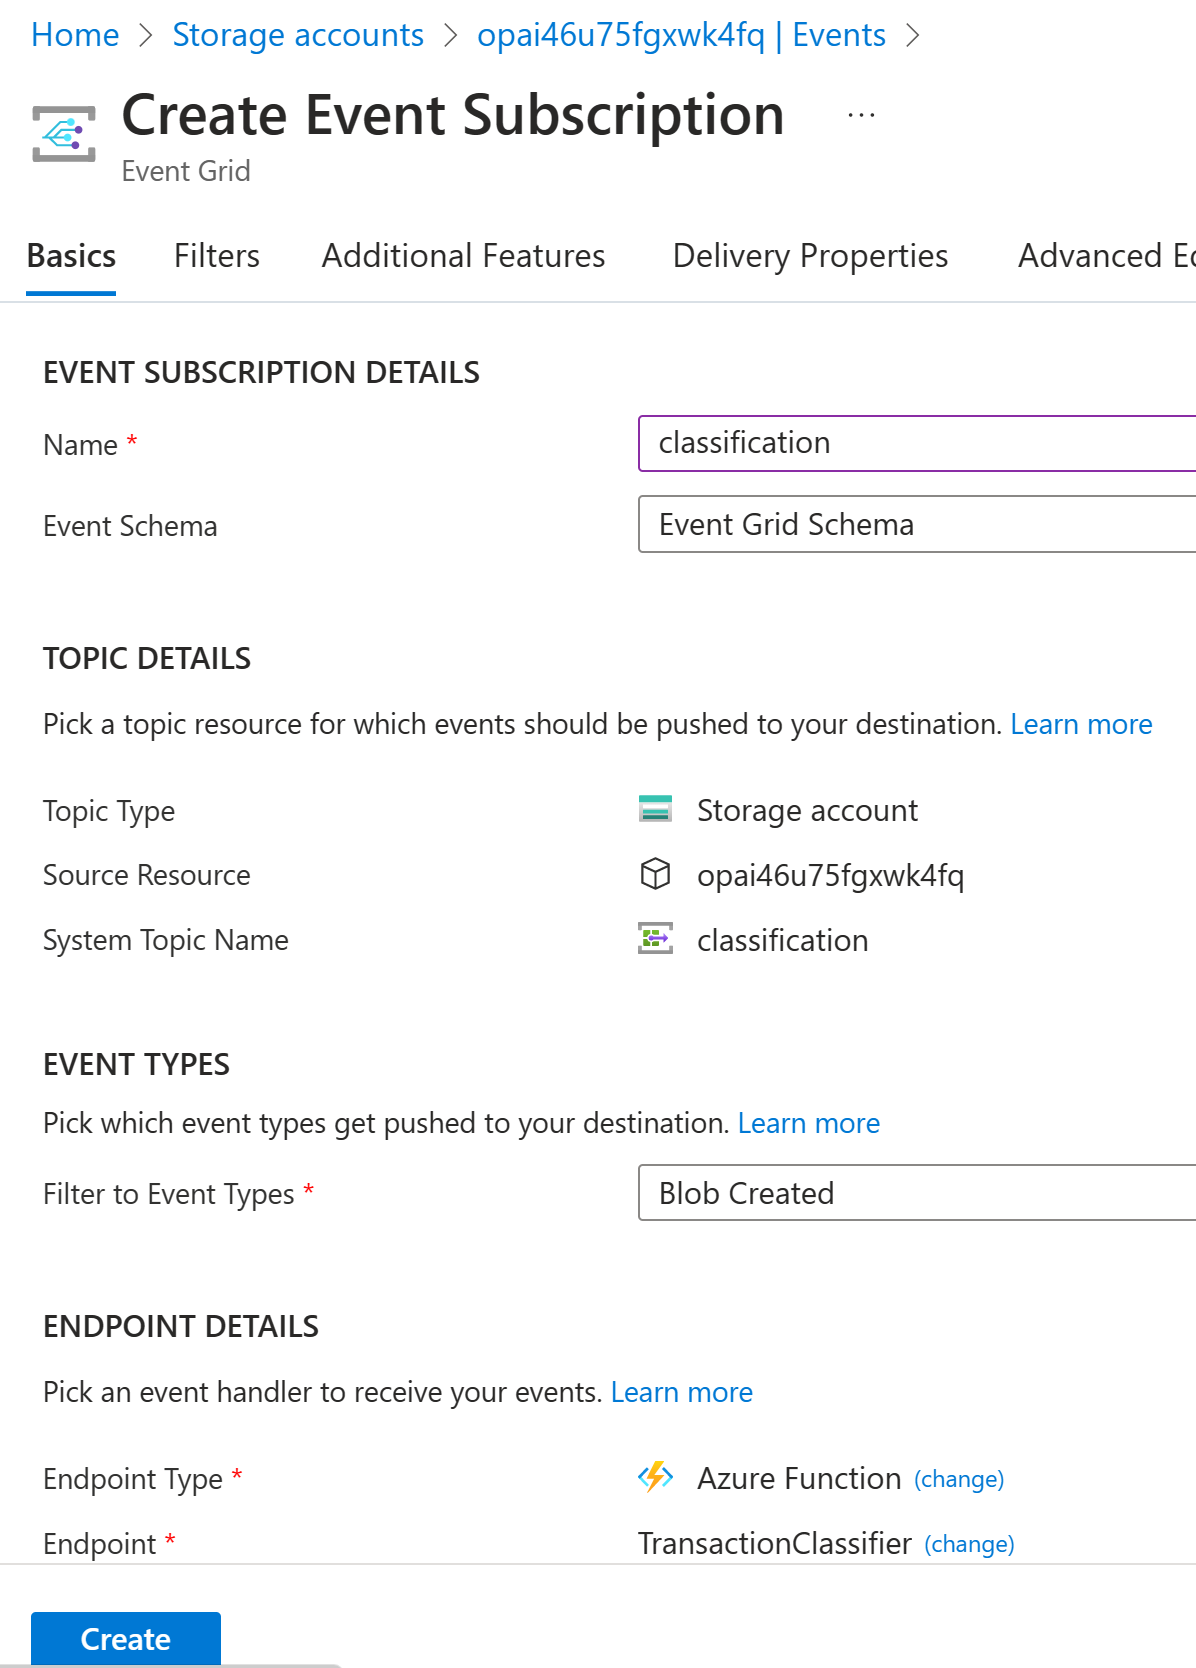
Creating and configuring Event Grid Subscription
- Create an
Event Grid Subscriptionto the Azure Function App Resource from the Azure Storage Account for “Blob Created” events in Azure portal:- Navigate to your
storage account > Events > + Event Subscription - Set
Event SchematoEvent Grid Schema` - Set
System Topic Nametoclassification - Select only
Blob Createdevent type - Select
Function Appas theEndpoint Type - Set
Endpointvalue by selecting the correctSubscription,Resource Group,Function App,Slot, andFunctionfrom the dropdowns - Click
Createto create the subscription
- Navigate to your
Testing Transaction Classification App
- Open the sample transaction file 25000_spend_dataset_current_25.csv and notice that the classification column is empty. This is the column that will be populated by the Azure Function by calling Azure OpenAI API.
- Upload this file to the classification blob container:
portal > storage account > containers > classification > upload - After few seconds, download the updated file from the output blob container
portal > storage account > containers > output > download - Open the file and notice the classification column is populated with the predicted category for each transaction.
Delete Resources
- Delete all resources created in this lab by deleting the resource group that was created in the first step of this lab.
az group delete --name <resource-group-name> --yes